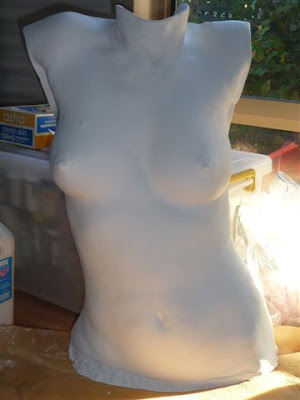
 These are the finished images of the cast, bronze patina and waxed with a brown wax to highlight and protect the cast.
My beautiful model is propped in position for the duration of the plaster casting session, the pose needs to be taken into consideration, as to whether the model can maintain this position for about 30 minutes approximately.
The model is covered with a layer of petrolium jelly and her pose needs to have some support for her to be comfortable. Her arms are supported and her hip leans against the table.
On this day the model is working in extreme heat of 39 degrees c which added to the difficulty of the pose being held.
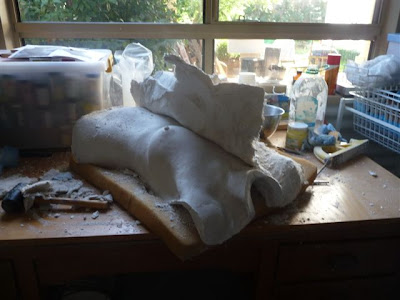
The cast has been removed and inspected for faults on the plaster. Although there are some bubbles, the cast has been successful.
The mould is repaired with fresh plaster where there are small blemishes such as bubbles and minor problems on the surface.
The mould is brushed with more petrolium jelly to make sure the new layer of plaster does not stick to the existing plaster whilst making a cast of the body mould.
Plaster is prepared in batches and brushed into the mould and built up to an even thickness all over the cast of 20 cm or 3/4 inch. The back of the mould is smoothed out and this time can be used to include arrangements for hanging the piece or incorporating a rod for a stand.
 Once the plaster has set, leave several hours before taking the original mould off the second plaster being careful to not to mark or dig your tools into the new cast
 Again blemishes in the new plaster can be filled by wetting the plaster down and filling with a small batch of new plaster in the holes as seen on the inner breast area.
 Areas can also be strengthened where they are thin as on the lower edge of the torso and around the armholes and inner neck.
The back of the form can also be shaved back with a surform or knife if the plaster is too thick.
 Work still needs to be done on the edge of the arms and at the back of the neck, but it is New Year's eve and I was sure the client would like a glimpse of the work.
 I am happy with the work and so is the client.
The plaster now needs to dry out completely for about two weeks before applying the patina or colouring of the plaster.
 The patching of holes can be seen under the breast where a cavity was repaired.
 I decided to paint the surface with a layer of white acrilic paint to have a clean surface to work on although this is not necessary.
I then used the instructions from an old book I had used many year's ago, Modelled Sculpture & Plaster Casting by Arnald Auerbach in chapter 13 on finishing and colouring plaster casts.
A thin layer of shellac is painted over the cast and allowed to dry.
The next step is to add some Burnt umber powder into a small amount of the thinned shellac or White Polish in a saucer and give the cast a coating of this.
 Then add some bronze powder and drag it into the coating on the prominences of the cast.
It can look too aggressive and I found it took a few attempts to make it look like a bronze cast
 I wasn't completely satisfied with the result but went on and melted some beeswax with a little Turps overnight and added burnt umber to the liquid wax and painted on the coloured wax.
 and also applied the same sequence to the back of the cast
 I kept having small troublesome areas that would not colour correctly and always looked like patched colour and the trouble with shellac is the fact if you work the area a little too long the coloured ares becomes sticky and lifts off easily which kept happening.
Eventually we decided that I could use the work also so that meant that I needed to make a mould to recast another piece for myself and that also gave us the possibility to have a bronze piece cast as well.
This meant that I would need to make a two piece mould and that I could retackle the colour of the first cast again after making the new 2 piece mould.
 The troubled colour is evident on the side of the torso as it lays on a blanket of clay.
A wall of clay is placed around the torso and built across the chest and stomach to divide the piece for easy separation.
 A layer of silicone rubber was first placed over half the torso and allowed to set over night
 A second thin layer layer was placed over the first layer and squares of felt covered this whilst it was still sticky and allowed to go off.
 Two layers of resin with fiberglass cloth imbedded between the layers was then added to the felt making a three layer flexible mould.
 The sides of the mould were trimmed, the clay fence down the middle was removed and cleaned and a coating was applied to the areas where the second side would butt against the first side so that it would not stick together.
 The same proceedure was repeated on the second side of the torso.
Edges trimmed and seam line brushed with petrolium jelly to stop the rubber adhering to the parting seam.
 Silicone rubber layers first.
 Then the resin layers.
After the resin has cured, the seams are trimmed and holes are drilled in the parting seams to screw the pieces together, so they can be unscrewed to take each side off separately.
This is done before the moulds are taken apart.
 The screws can now be removed.
The first side is removed and it has partly peeled off the layer of colour with the rubber.
 Second half removed and the parting line can be seen.


